Table of Contents
How to Apply Mascara the Right Way
If there’s one product that can instantly elevate your eye makeup, it’s mascara. A good mascara adds color, volume, and definition—especially important now, when our eyes often do all the talking.
But let’s be real for a second. We’ve all been there: you’re finishing your makeup, everything looks perfect, and then—boom—clumpy lashes ruin the moment.
The good news? It’s totally avoidable.
Let me walk you through simple, tried-and-true tips I personally swear by to keep lashes smooth, defined, and fluttery—every single time.
Avoid Applying Too Many Layers
We all want longer, fuller lashes—it’s tempting to keep layering mascara. But this is where most clumping starts.
Here’s what actually works:
Choose a mascara that delivers results in one or two coats
Apply the first coat and let it dry completely before adding another
Don’t rush—mascara dries quickly, and patience pays off
Less product + proper drying time = cleaner, more polished lashes.
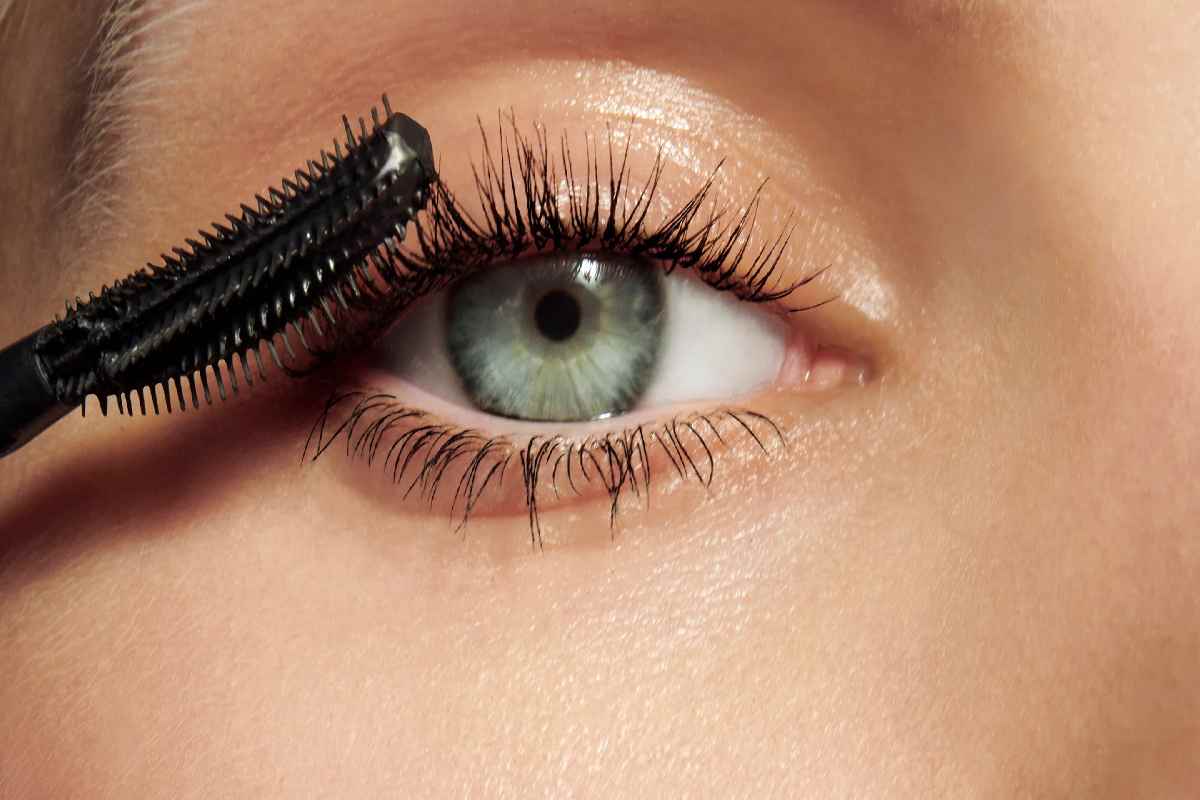
How to Apply Mascara Correctly
The application technique makes all the difference.
My go-to method:
Start at the base of your lashes
Move the wand upward using a gentle zig-zag motion
Finish by sweeping toward the tips
This motion evenly distributes product and separates lashes, preventing clumps before they even form.
Also—wipe excess mascara off the wand before applying. Overloading the brush is a clump magnet.
Don’t Skip the Eyelash Curler
I used to underestimate this tool—until I actually used it properly.
If you have short or straight lashes, an eyelash curler is non-negotiable.
Curl lashes before applying mascara
Hold for a few seconds to create a lifted shape
Follow with one or two light coats of mascara
The difference is night and day. Curled lashes instantly look longer and more defined.
Comb Your Lashes (Yes, Really)
This step feels extra—but it works like magic.
Once your mascara has dried:
Use a clean eyelash comb
Gently comb through lashes to remove any product buildup
The result? Separated, natural-looking lashes that don’t feel heavy or stiff. You might even do a double take in the mirror.
How to Keep Your Mascara in Perfect Condition
Mascara typically lasts 3–4 months. After that, it can dry out or become clumpy.
If your mascara starts thickening, try one of these rescue tricks:
✔ Store It Properly
Always keep mascara at room temperature. Heat and air exposure dry it out faster.
✔ Add Moisture (My Favorite Fix)
Instead of oil, add a few drops of eye drops or saline solution.
This restores moisture without making the formula greasy or runny.
✔ Use Heat (Emergency Only)
Place the closed mascara tube in warm water (bain-marie style) for a few minutes.
It softens the product without changing the formula—but only do this occasionally.
How to Remove Mascara the Right Way
Improper removal is a hidden reason lashes clump the next day.
Here’s what to do:
Soak a cotton pad with remover or oil
Press gently onto lashes for a few seconds
Wipe downward—never rub aggressively
About Waterproof Mascara
Waterproof formulas last longer—but they’re harder to remove and can stress lashes. I recommend saving them for special occasions.
Gentle removal options:
Commercial eye makeup remover
Extra virgin olive oil or coconut oil
Petroleum jelly (great for sensitive eyes)
All of these dissolve mascara without pulling or damaging lashes.
Final Thoughts
Perfect lashes aren’t about piling on product—they’re about technique, patience, and care. With the right steps, mascara becomes your secret weapon instead of your biggest frustration.
Next time you apply mascara, take it slow, keep it light, and trust the process. Your lashes will thank you.